

Debugging Method Of Intelligent Module For Electric Valve Positioner
1. electrical connections
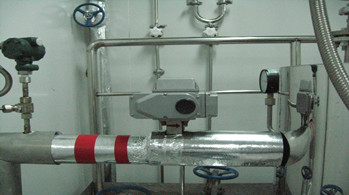
As shown in the figure: PTM terminal DC 24V regulated power supply, if connected to the ammeter or current sensor, can be observed Current change. (the EP terminal of the circuit board is not integrated with the locator. It is not necessary to connect. )

2. Make the module work properly
When the electrical connection is complete, the module defaults to normal operation. For example, due to transport and other reasons, the module feedback signal deviation is beyond the allowable range, and can be adjusted according to the following "debugging method"
3. Debugging method
(1) electrical connections
In the PTM terminal connection number 24V DC regulated power supply, and a series of ammeter (or multimeter, DC 100mA current grade), so as to observe the PTM end feedback signal current.
Note: try not to connect directly to the DCS system unless you can make sure that the DCS system is absolutely complete so that the smart modules can be debugged as soon as possible.
Observe the ammeter reading: at this time, the ammeter reading should be between 4mA and 20mA any value.
(2 )Make the module into debug state
Press and hold as far as the picture shows. The rightmost button is not placed until the indicator light on the module lights up. Then the button is released and the indicator blinks. This means that the module has entered the debug state.
Observe ammeter reading: at this time ammeter reading should be 4mA, if there is deviation, can press "+" key or "-" key to adjust the current, make current value meet the requirement.
(3)Feedback signal 0‰(4mA) position adjustment
The valve is in the original position of 0‰(4mA). Press the "+" or "-" key to adjust the current so that the current value meets the requirements, and then press the rightmost button on the top of the picture.
Observe the ammeter reading: if the ammeter reads from 4mA to 8mA or so, it means that the feedback signal is needed. The position of 0‰(4mA) has been confirmed. The module waits for the feedback signal to confirm the position of 25‰(8mA).
(4) Feedback signal 25‰(8mA) position adjustment
The valve is at the position of 25‰ signals (8mA) of the signal. The current is adjusted by "+" or "-", so that the current value meets the requirements, and then click the rightmost button on the top of the picture.
Observe the ammeter reading: if the ammeter reads from 8mA to 12mA or so, it means that the feedback signal is needed. The position of 25 8mA has been confirmed. The module waits for the feedback signal to confirm the position of 50‰(12mA).
(5) Feedback signal 50‰(12mA) position adjustment
The valve is at the position of 50‰ signals (12mA) of the signal. The current is adjusted by "+" or "-", so that the current value meets the requirements, and then click the rightmost button on the top of the picture.
Observe the ammeter reading: if the ammeter reads from 12mA to 16mA or so, it means that the feedback signal is needed. The position of 50(12mA) has been confirmed. The module waits for the feedback signal to confirm the position of 75 ‰(16mA).
(6) feedback signal 75‰(16mA) position adjustment
The valve is at the position of 75‰ signals (16mA) of the signal. The current is adjusted by "+" or "-", so that the current value meets the requirements, and then click the rightmost button on the top of the picture.
Observe the ammeter reading: if the ammeter reads from 16mA to 20mA or so, it means that the feedback signal is needed. The position of 75‰(16mA) has been confirmed. The module waits for the feedback signal to confirm the position of 100‰(20mA).
(7) Feedback signal 100‰(20mA) position adjustment
The valve is at the position of 100‰ signals (20mA) of the signal. The current is adjusted by "+" or "-", so that the current value meets the requirements, and then click the rightmost button on the top of the picture.
Observe the ammeter reading: at this time the ammeter reading is reduced first, and when the reading is stable, it is restored to 20mA, and the indicator light on the module is blinking.
(8) Quit debugging and turn to normal working condition
When the seventh step is completed, the module automatically enters its normal working state。
Leading manufacturer of industrial automation equipment
 HOME
HOME
 Tel:400-027-3353
 Fax:027-60706976/60706977
 Email: ft@grat.com.cn
  Web:en.grat.com.cn


 Electric actuator


 Tel:400-027-3353
 Fax:027-60706976/60706977
 Skype:grat2015@outlook.com
 Email:
 Add:B8-3-2, OVU,Wuhan,Hubei,China.